How to Screen Mirror on Mac: Easy Steps Guides & Tips
If you want to know how to screen mirror on Mac, you’re in the right place. Screen mirroring allows you to easily show your Mac’s screen on another device, making it simple to share content for work, school, meetings, or entertainment.
Mac users can mirror their screens to smart TVs, projectors, or other computers. This is great for presentations, lessons, or watching videos on a more prominent display. It’s a valuable tool for many different tasks.
Screen mirroring is becoming even more critical as more people work from home. It helps with online meetings, software demos, and group video watching.
This guide will show you how to mirror a Mac screen. We’ll cover Apple’s AirPlay, third-party apps, and wired options. Plus, you’ll get easy steps, troubleshooting tips, and security advice.
What is Screen Mirroring?
Screen mirroring lets you show your Mac’s screen on another device in real time. You can project it onto a smart TV, external monitor, or other screens. This makes it easy to share content without using cables. Unlike screen sharing, which lets others control your device, screen mirroring only shows what’s on your screen.
Screen mirroring sends video and sound from your Mac to another device. It can use a wireless link, like Apple’s AirPlay over Wi-Fi, or a wired link with an HDMI or USB-C cable. Some apps can mirror your screen and connect to non-Apple devices.
This feature is helpful in many ways. At work, teams can show presentations and documents without switching devices. Teachers and trainers can use it to show lessons on a bigger screen. Users can stream videos, play games, or share photos and movies on a larger screen for fun. Gamers and creators can preview their work on a second screen without moving files.
Screen mirroring is excellent for work, learning, and fun. Mac users can choose the best method for them, whether wireless or wired.
How to Screen Mirror on Mac: Step-by-Step Guide
Using AirPlay to Screen Mirror on Mac
AirPlay is Apple’s native wireless streaming technology, designed to mirror content from one Apple device to another. It is compatible with most modern Mac models and can mirror the Mac’s screen to various devices, such as Apple TV, AirPlay-enabled speakers, or other supported devices. The simplicity and reliability of AirPlay make it one of the most popular methods for screen mirroring on Mac, offering a seamless, integrated experience across the Apple ecosystem.
To begin using AirPlay for screen mirroring on your Mac, follow these steps:
- Ensure both devices are on the same Wi-Fi network. For successful screen mirroring, the Mac and the device you wish to mirror, such as an Apple TV, must be connected to the same Wi-Fi network. This allows the devices to communicate and establish a secure connection.
- Open the “Control Center” on your Mac. On a Mac running macOS Big Sur or later, the Control Center can be accessed from the menu bar at the top right of the screen. Click the Control Center icon, which looks like a series of toggle switches.
- Click on “Screen Mirroring” and select the device. In the Control Center, click on the “Screen Mirroring” option. A list of available devices will appear. Choose the device (e.g., Apple TV) to mirror your Mac’s screen. The device will appear in the list if it is compatible and available.
- Enter the AirPlay code if prompted. Depending on the device you are mirroring to, you may be asked to enter an AirPlay code. This code typically appears on the receiving device’s screen. Enter it on your Mac to establish the Connection.
Once connected, your Mac’s screen will be mirrored to the selected device. Any changes or actions on your Mac, such as opening apps or browsing files, will be instantly reflected on the mirrored Display.
Troubleshooting Tips for AirPlay
While AirPlay is generally straightforward to use, users occasionally encounter issues. The following are some typical issues and potential fixes:
- Devices Not Connecting: Ensure the two devices are linked to the same Wi-Fi network. Restart the Mac and the receiving device if the Connection is not established. Additionally, check that AirPlay is enabled on the receiving device (e.g., Apple TV).
- Lag or Delayed Display: A weak Wi-Fi signal can result in lag or delayed screen mirroring. To improve the Connection, ensure that your Mac and the receiving device are near the Wi-Fi router, and try minimizing the number of devices using the network. You can also reduce the resolution of the mirrored Display.
- Audio Issues: Sometimes, audio may not transmit correctly along with the video. Ensure that the audio output on your Mac is set to the AirPlay device. This can be done by clicking on the sound icon in the menu bar and selecting the desired output device. Restarting both devices or toggling the sound settings if issues persist can help resolve the problem.
Following these steps and troubleshooting tips, you can enjoy smooth and reliable screen mirroring via AirPlay on your Mac.
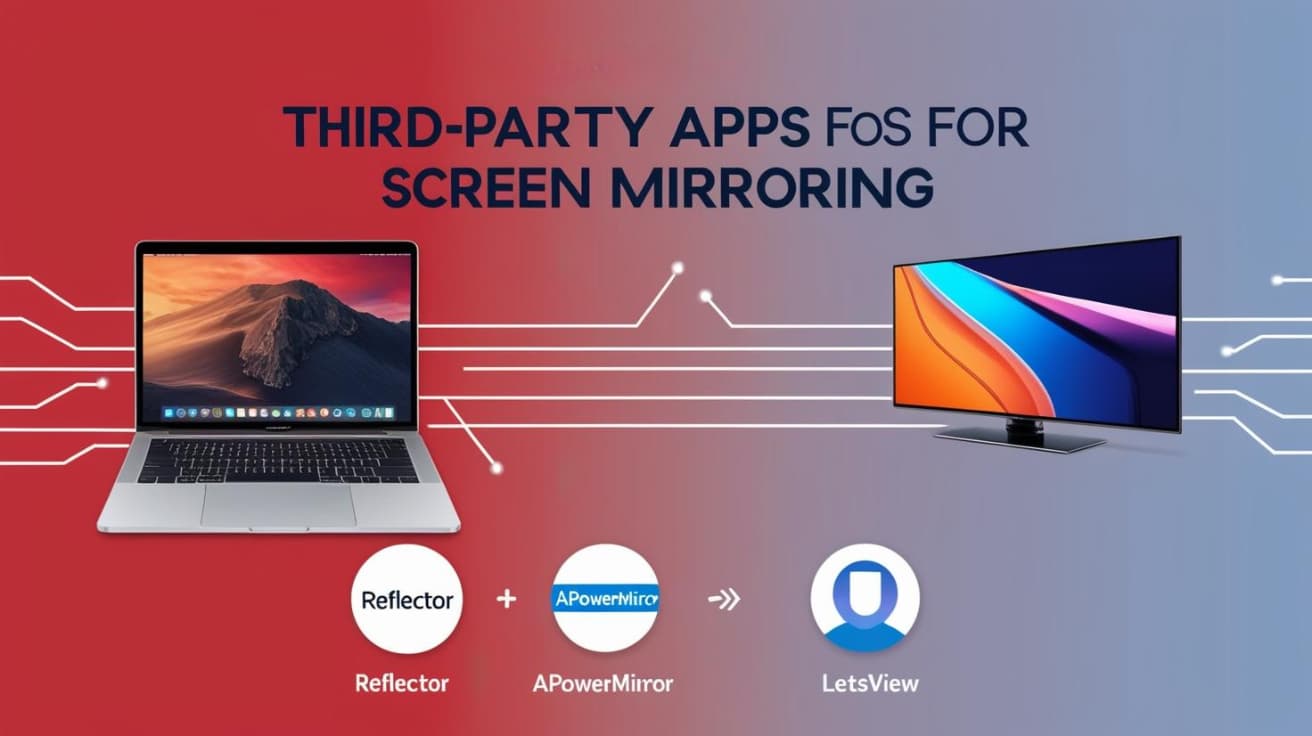
Using Third-Party Apps for Screen Mirroring
AirPlay is the most popular way to mirror a Mac screen, but third-party apps give extra options. These apps work well for non-Apple devices or if you want more control. Apps like Reflector, ApowerMirror, and LetsView are great choices. Each app has unique features that can help in different situations.
Reflector
Reflector is a simple and flexible app. It lets you wirelessly mirror your Mac to smart TVs, computers, and Android devices.
Key Features:
- Mirror to multiple devices at once.
- Easy Setup: Install Reflector on your Mac and the device you want to mirror to. Make sure both are on the same Wi-Fi.
- Multi-device Support: Choose the device you want to mirror through the app.
Reflector is a good choice for users who want a simple and reliable way to share content on multiple devices.
ApowerMirror
ApowerMirror is a flexible app for iOS and Android devices. It lets you mirror and control devices from your Mac, which is helpful for live demos, presentations, or fixing problems from a distance.
Key Features:
- Works with both wireless and wired connections.
- Control the mirrored device from your Mac.
- Works with iOS, Android, Windows, and Mac.
ApowerMirror is best for users who need cross-platform support and more control over the mirrored device.
LetsView
LetsView is a free, simple app for screen mirroring. It works across different devices and is great for education or presentations. It also includes features like screen recording and annotations.
Key Features:
- Free with no ads.
- Supports wireless mirroring.
- Includes screen recording and annotations.
LetsView is perfect for users who need an easy and free mirroring tool.
Pros and Cons of Using Third-Party Apps
Third-party apps like Reflector, ApowerMirror, and LetsView often offer more features than built-in options, but they also have some downsides:
| Pros | Cons |
|---|---|
| Works with many devices | Some apps need a paid version for full use. |
| Features like screen recording and annotations | Compatibility issues with some Mac OS versions. |
| Supports multiple devices | May have lag or connection problems, especially on Wi-Fi. |
Screen Mirroring to Non-Apple Devices
One big plus of using third-party apps is that you can mirror your Mac to non-Apple devices. This lets you extend your Mac’s screen to smart TVs, Android devices, or gaming consoles.
Mirroring to Smart TVs
Smart TVs are a common choice for screen mirroring. If the TV supports AirPlay, it’s easy to mirror. But for TVs that don’t support it, apps like Reflector and ApowerMirror can help. These apps let you connect and start mirroring.
For TVs that don’t support AirPlay:
- Use Reflector or ApowerMirror to set up the Connection.
- Some TVs may need an Apple TV or Chromecast to work.
Mirroring to Android Devices
You can also mirror your Mac to Android devices like phones or tablets. Apps like ApowerMirror and LetsView allow both wireless and wired connections.
Steps for Android Devices:
- Install the app on both your Mac and Android devices.
- Make sure both devices are on the same Wi-Fi network.
- Choose the Android device in the app to start mirroring.
This method is excellent for showing apps, games, or other content from your Mac to your Android device.
Using HDMI Adapters and Wireless Dongles (Chromecast)
If you’re using non-Apple devices that don’t support wireless mirroring, an HDMI adapter or Chromecast can help.
HDMI Adapters:
- Easy Setup: Plug the HDMI adapter into your Mac and connect the other end to the TV or monitor.
- Stable Connection: This method is reliable and usually has no lag.
Chromecast:
- Wireless Setup: Use Chromecast to mirror wirelessly.
- Setup: Install the Chromecast app and connect your Mac and Chromecast to the same Wi-Fi network.
These methods let you mirror your Mac to almost any device, making sharing content with non-Apple devices easier.
Requirements for Screen Mirroring on Mac
You need a few things before you begin screen mirroring on your Mac. These steps will help everything work smoothly and avoid common issues.
Compatible Mac Models and macOS Versions
Not all Macs can mirror their screen and your macOS version matters.
- Mac Models: Most MacBooks, iMacs, Mac Minis, and Mac Pros from 2011 and newer can mirror their screens. Older models may have trouble with the latest features like AirPlay or some apps.
- macOS Version: To use AirPlay and other screen mirroring features, your Mac should run a newer version (usually macOS Monterey or later). Older versions might not support newer features or apps.
To check your Mac’s compatibility, click the Apple Menu and select About This Mac. This will show your macOS version and Mac model.
Supported Devices
You need compatible devices to mirror your Mac screen. These include:
- Apple TV: If you want to use AirPlay, you’ll need an Apple TV (4th generation or later).
- Smart TVs: Many newer smart TVs (like Samsung, LG, and Vizio) have AirPlay built-in. If your TV doesn’t, apps like Reflector or ApowerMirror can help.
- Other Devices: Non-Apple devices, like Android phones, gaming consoles, or Windows PCs, may need third-party apps like Reflector, LetsView, or Chromecast to mirror your Mac’s screen.
Stable Wi-Fi Connection
A good Wi-Fi connection is essential for smooth screen mirroring. Most mirroring methods use Wi-Fi, so a steady connection is key to avoid lag or interruptions.
- Your Mac and the device you want to mirror must be on the same Wi-Fi network.
- Use a 5 GHz Wi-Fi band for better performance, especially with high-quality content.
If you have connection problems, try restarting your router or moving closer to it.
Necessary Cables or Adapters
While many screen mirroring methods are wireless, some setups may need cables or adapters.
- HDMI Adapters: You may need an HDMI adapter if your TV or monitor doesn’t support wireless mirroring. If your Mac doesn’t have an HDMI port, you may need a USB-C to HDMI adapter.
- USB-C/Thunderbolt Ports: Newer Macs, like MacBook Pro and MacBook Air, use USB-C or Thunderbolt ports. Check if you need an adapter for your Display or device.
- Wireless Dongles: Chromecast or similar devices can wirelessly mirror your Mac to a TV. Install the required software and ensure the Mac and the device are on the same Wi-Fi network.
Additional Software or Hardware Requirements
If you’re using third-party apps or other methods, there are a few more things to consider.
- Third-Party Apps: Apps like Reflector, ApowerMirror, and LetsView need software on your Mac and the device you want to mirror. Some apps require specific operating systems or devices, like Chromecast or AirPlay receivers.
- HDMI Adapters: If you use an HDMI adapter, ensure it’s the right type for your Mac (e.g., USB-C to HDMI or Thunderbolt to HDMI).
- Chromecast/Google Cast: To use Chromecast, you need to install Google Chrome on your Mac and use its casting feature.
By following these steps, you can set up screen mirroring without issues. Whether you’re using an Apple TV, smart TV, or a non-Apple device, these requirements will help ensure a smooth experience.

Troubleshooting Common Screen Mirroring Issues on Mac
Screen mirroring on a Mac is usually straightforward, but sometimes issues can happen. These problems could be with the Connection, video quality, or sound. Knowing the common causes and fixes can help you quickly solve these problems. Below are some of the most common issues and how to fix them.
Screen Mirroring Not Working
There are a few reasons why screen mirroring might not work. The first step is figuring out what’s causing the problem.
Possible Causes:
- Network Issues: Your Mac and the device you want to mirror must be on the same Wi-Fi network. If they aren’t, the Connection won’t work, and a weak Wi-Fi signal can cause it to drop.
- Outdated Software: If your Mac or the device you’re mirroring has obsolete software, they might not work together correctly. Make sure both devices have the latest updates.
- Incompatible Devices: Certain screen mirroring methods may not work with some devices. If you’re trying to mirror to a non-Apple device, you might need an extra app.
Solutions to Fix the Problem:
- Restart Devices: Turning off and on your Mac and the device you’re trying to mirror can fix connection problems.
- Update Software: Ensure your Mac uses the latest macOS version, and check if your receiving device has the latest software updates.
- Check Wi-Fi: Confirm that both devices are connected to the same Wi-Fi network. If the Connection is poor, restarting your router could help.
Poor Video Quality or Lag
Sometimes, the video can be choppy, blurry, or delayed. This often happens because of a network or device issue.
Why This Happens:
- Weak Wi-Fi Signal: Screen mirroring needs a good Wi-Fi signal. If the signal is weak, the video may freeze or become blurry.
- High Network Traffic: If other devices on your network use a lot of internet (like streaming videos or playing games), it can slow down your screen mirroring.
Tips to Improve Performance:
- Move Closer to the Router: If you’re far from the router, try moving closer to get a better signal. Using a 5 GHz Wi-Fi network can help, too, as it’s faster and less crowded than 2.4 GHz.
- Close Background Apps: Close unnecessary apps on your Mac. This frees up resources for screen mirroring.
- Reduce Other Network Activity: To free up bandwidth, limit what other devices on the network are doing, like downloading or streaming.
Device Not Detected
If your Mac cannot find the device you want to mirror, here are some steps to try.
Steps to Ensure Devices Are Discoverable:
- Enable AirPlay: Check that AirPlay is turned on for the device you’re trying to mirror, like an Apple TV. It might be off by default.
- Check Network Settings: Ensure your Mac and the receiving device are on the same Wi-Fi network. You can check this in System Preferences > Network on your Mac.
- Restart Devices: Try restarting both your Mac and the receiving device. This can help them find each other.
How to Reset Network Settings:
- On Mac: Go to System Preferences > Network, select your Wi-Fi, and click Advanced. You can remove the Wi-Fi network and reconnect to refresh the Connection.
- On Apple TV: Go to Settings > AirPlay and HomeKit, turn AirPlay off, and turn it back on to reset the Connection.
Audio Not Working During Screen Mirroring
If you’re not hearing sound while screen mirroring, it’s often due to audio settings.
Common Causes:
- Wrong Audio Output Settings: If your Mac cannot send audio to the correct device, you won’t hear any sound.
- Low Volume or Muted Audio: Ensure the volume is up on both your Mac and the receiving device. Check if your Mac is muted.
Step-by-Step Solutions to Fix Audio Issues:
- Check Audio Output: Go to System Preferences > Sound > Output on your Mac and select the correct audio device, such as your TV or speakers.
- Ensure Volume is Up: Make sure the volume is up on both your Mac and the device you’re mirroring.
- Restart Devices: Restart both your Mac and the receiving device. This can fix audio issues.
- Check for Software Conflicts: Make sure no other apps on your Mac are blocking the audio. Close unnecessary apps to avoid conflicts.
Following these steps, you can fix the most common screen mirroring issues and enjoy a smooth, hassle-free experience.
Alternatives to Screen Mirroring on Mac
Screen mirroring is a common way to share your Mac’s screen, but other methods might work better, depending on your needs. These options can give you more control, reliability, or a more straightforward setup.
Screen Sharing vs. Screen Mirroring
Screen sharing and screen mirroring sound similar, but they work differently.
- Screen Mirroring duplicates your Mac’s screen on another device, like a TV or computer. This is helpful for presentations, watching videos, or showing content during meetings. The second device only displays what’s on your Mac but can’t control it.
- Screen Sharing lets you show your screen and control the other device. It’s helpful for remote work, troubleshooting, and collaboration. The person on the other device can move the mouse, open apps, and make changes as if using your Mac.
When to Use Screen Sharing:
- Remote Work: Work with others by sharing and controlling the same screen.
- Tech Support: Help someone by controlling their Mac to fix issues.
- Teaching: Guide students step-by-step in real time.
Using HDMI or USB-C Cables
Another way to connect your Mac to a display is by using a cable, like HDMI or USB-C. This does not rely on Wi-Fi, making it more stable, especially with a weak wireless connection.
How to Connect:
- HDMI: If your Mac has a port, plug in the cable. If not, use an adapter (USB-C or Thunderbolt to HDMI).
- USB-C: Newer Macs have USB-C or Thunderbolt 3 ports. Use a USB-C to HDMI or USB-C to DisplayPort cable.
This method is best for a stable, lag-free connection. It works well for streaming videos, gaming, or presentations.
Pros of Using Cables:
- Stable Connection: No lag or interruptions like Wi-Fi.
- Better Video & Sound: HDMI supports high-quality video and audio.
- No Wi-Fi Needed: Works even when the internet is slow or unavailable.
Cons of Using Cables:
- Limited Movement: You can’t move far from the Display.
- Less Convenient: You must plug and unplug the cable.
- Extra Adapters: Some Macs need adapters, adding cost.
Choosing the correct method depends on your needs. Screen mirroring is suitable for simple sharing, while screen sharing is better for working together. Cables give you the best quality and stability for videos and presentations.
Advanced Screen Mirroring Features on Mac
Macs can do more than basic screen mirroring. You can also extend your Display, use an iPad as a second screen, and adjust settings to fit your needs. These features help you work better and faster.
Mirroring vs. Extending Your Display
Mirroring and extending have different uses.
- Mirroring: This shows the same screen on your Mac and the external Display. It’s useful for presentations, meetings, or watching videos on a bigger screen.
- Extending adds a second screen, letting you move windows between displays. This is helpful for multitasking, editing, coding, or using several apps simultaneously.
When to Use Each Option:
- Use mirroring when showing slides, playing videos, or sharing your screen.
- Use extending when working with multiple apps, editing content, or reading one document while writing in another.
How to Switch Display Modes:
- Connect your external screen with HDMI, USB-C, or AirPlay.
- Click the Apple menu () and open System Settings > Displays.
- Under Arrangement, pick Mirror Displays or Extend Display by dragging the screens into place.
- For quick access, press Option + F1 (Brightness Down) or use Control Center > Screen Mirroring.
Using Sidecar to Mirror Your Screen
Sidecar enables you to use an iPad as a Mac’s second screen. You can extend your workspace or mirror your Mac’s Display. Sidecar also works with Apple Pencil and touch gestures, making it great for creative work.
Why Use Sidecar?
- Apple Pencil & Touch Support: Draw, take notes, or quickly navigate apps.
- Wireless or Wired Connection: Use Wi-Fi for flexibility or a USB cable for a stable link.
- Works with Mac Apps: Compatible with Final Cut Pro, Photoshop, and Logic Pro apps.
How to Set Up Sidecar:
- Ensure your Mac and iPad use the same Apple ID and are linked by Wi-Fi or USB.
- Open the Control Center and tap Screen Mirroring.
- Select your iPad.
- Choose to extend or mirror your Display.
- Go to System Settings > Displays to adjust resolution and layout.
These features help you customize your Mac setup, improve workflow, and stay productive.
Screen Mirroring for Different Needs
Screen mirroring on a Mac is helpful for both work and fun. Whether you’re giving a presentation or watching a movie, knowing the proper steps can make the process easy and hassle-free.
Screen Mirroring for Business Presentations
Mirroring your Mac’s meeting screen helps you share slides, documents, and videos on a more prominent display. This makes it easier for teams and clients to follow along. To avoid issues, prepare ahead of time.
Tips for a Smooth Presentation:
- Test the Connection Early: Before the meeting, check that mirroring works. Make sure the Display, sound, and internet connection are ready.
- Use a Reliable Connection: HDMI and USB-C cables give the best performance. If using AirPlay, ensure a strong Wi-Fi signal to prevent lag.
- Turn Off Notifications: Stop pop-ups by enabling Do Not Disturb in the Control Center under Focus Modes.
- Adjust Display Settings: Open System Settings > Displays to match the resolution of the external screen for a clear image.
- Use Presenter Tools: Apps like Keynote and PowerPoint let you see speaker notes on your Mac while showing only slides on the mirrored screen.
Best Tools for Presentations:
- Keynote & PowerPoint: Both offer professional presentation features.
- Zoom & Microsoft Teams: Allow screen sharing in virtual meetings.
- Apple TV & AirPlay: A tremendous wireless option if you don’t want to use cables.
- HDMI Adapters: Provide a stable, lag-free connection for large screens and projectors.
Screen Mirroring for Entertainment
Mirroring lets you watch videos, movies, and shows from your Mac on a bigger screen. The proper setup ensures the best viewing experience.
Ways to Mirror Streaming Services from Mac to TV:
- AirPlay: Open the video, click the AirPlay icon, and select your Apple or compatible smart TV.
- HDMI Cable: Connect your Mac to the TV with an adapter for the best picture quality.
- Third-Party Apps: Apps like JustStream or AirBeamTV let you mirror non-Apple TVs without cables.
Fixing Issues Like DRM Restrictions or Black Screens:
Some streaming services, like Netflix and Disney+, block mirroring due to copyright protection (DRM). If you see a black screen, try these fixes:
- Use AirPlay Streaming: Some apps allow direct AirPlay streaming instead of full mirroring.
- Switch Browsers: Safari often works better with AirPlay than other browsers.
- Lower the Video Quality: Reducing resolution in playback settings may help.
- Check App Settings: Some apps have AirPlay settings that must be enabled.
Following these steps, you can make screen mirroring work smoothly for work or entertainment.
Security and Privacy Risks When You Screen Mirror on Mac
Screen mirroring on your Mac is helpful but can risk your privacy and security. Protecting your data and preventing others from accessing it is essential whether using AirPlay, third-party apps, or a wired connection.
Risks of Screen Mirroring on Public Wi-Fi
Using screen mirroring on public Wi-Fi can expose your Mac to threats. Hackers or others might access your data, view your screen, or mess with your Connection. This is especially risky in hotels, cafes, or conference centres.
How to Protect Your Mac While Screen Mirroring:
- Use a Private Wi-Fi Connection: Always connect to a private, password-protected network, not public Wi-Fi.
- Turn on Encryption: If using AirPlay or other wireless services, make sure encryption is turned on. Most Apple devices do this by default.
- Use a VPN for Extra Protection: A VPN hides your data and adds more security.
- Keep macOS and Apps Updated: Updates fix security issues and protect your Mac.
- Limit Devices That Can Connect: Only let trusted devices connect to your network in shared spaces.
How to Stop Screen Mirroring on Mac When Not in Use
Leaving screen mirroring on when it’s not needed can be risky. Others might see your private content or an unknown device could connect to your Mac.
How to Turn Off Screen Mirroring:
- Turn Off AirPlay: Open Control Center, click Screen Mirroring and select Stop Mirroring to disconnect.
- Unplug HDMI or USB-C Cables: If using a wired connection, unplug the cable to stop sharing.
- Turn Off AirPlay on Smart TVs: Some smart TVs save old connections. Check the TV settings and remove unwanted devices.
- Block AirPlay on Mac: Go to System Settings > Displays > AirPlay & Handoff and set AirPlay to Off or Only for This Mac to stop unauthorized devices from connecting.
Following these tips, you can safely use screen mirroring on your Mac and protect your personal information.
Comparing Screen Mirroring Options for Mac
There are several ways to mirror your Mac’s screen to other devices. Each method has strengths and weaknesses. The best option depends on convenience, device compatibility, and connection quality. This guide compares three popular methods—AirPlay, third-party apps, and HDMI—to help you choose the right one for your needs.
AirPlay vs. Third-Party Apps vs. HDMI
| Method | Pros | Cons | Best For |
|---|---|---|---|
| AirPlay | No cables needed. Works well with Apple devices. High-quality streaming. | Only works with Apple devices or AirPlay TVs. Can be slow with poor Wi-Fi. | Apple TV or AirPlay-compatible smart TVs. – Casual use and home entertainment. |
| Third-Party Apps | Works with many devices, including non-Apple TVs. – Custom options for advanced users. | May cost money or require a subscription. Can have bugs or connection issues. | Non-Apple devices or special setups where AirPlay doesn’t work. Mirroring across different TV brands. |
| HDMI | Very reliable. No Wi-Fi needed, no lag. | Needs cables and adapters. Limited range and movement. | Professional presentations. Situations where reliability is important. |
AirPlay: Wireless and Easy
AirPlay is Apple’s way of wirelessly streaming content from your Mac to devices like Apple TV or AirPlay-enabled smart TVs. It’s great for people who use Apple products because it connects quickly. However, AirPlay depends on a strong Wi-Fi connection. If the Wi-Fi is slow, you may notice lag or lower quality. It only works with Apple devices or those that support AirPlay.
Best For:
- Watching movies or shows on a bigger screen at home.
- People who use Apple TVs or AirPlay-enabled smart TVs.
Third-Party Apps: More Options
If you need more flexibility, third-party apps can mirror your Mac’s screen to a broader range of devices. Apps like JustStream and AirBeamTV work with many smart TVs, even if they don’t support AirPlay. These apps can also let you change the quality of the Display or mirror-specific apps. They’re suitable for advanced users or people with non-Apple devices. Some apps may need to be bought or have subscriptions, and connection issues may arise depending on the device.
Best For:
- People with non-Apple devices or mixed-device setups.
- Those looking for extra features or who need to mirror content to different platforms.
HDMI: A Reliable Wired Option
HDMI is a wired option for professional presentations or critical situations where connection reliability is key. It’s stable and provides a high-quality signal without lag or Wi-Fi problems. Since it doesn’t rely on wireless signals, it’s perfect for business meetings, conferences, or large venues. However, HDMI requires cables and limits how far you can move.
Best For:
- Important business presentations that need a stable connection.
- Situations where high-quality video and sound are crucial.
Which One Should You Choose?
- For convenience, if you want something wireless and easy to use and you’re already using Apple devices, AirPlay is the best choice. It’s simple to set up and works smoothly with Apple devices.
- For Quality and Reliability, HDMI is the way to go if you’re doing a presentation or need a very stable connection. It doesn’t rely on Wi-Fi so you won’t have any interruptions.
- For Compatibility: If you need to mirror your Mac to non-Apple devices, third-party apps give you the most options. Even though they might cost extra or have occasional issues, they are the best for cross-platform use.
By examining your specific needs, you can pick the best screen mirroring method for you. This will ensure smooth and practical presentations, entertainment, and content sharing.
Tips for Effective Screen Mirroring on Mac
Screen mirroring on a Mac is a simple way to share content. But, by following a few steps, you can make it work even better. Whether you are presenting, watching a movie, or sharing something, these tips will help improve performance and reduce frustration.
Optimize Your Mac’s Performance
Before you start mirroring, make sure your Mac is running well. The more free resources your Mac has, the smoother the mirroring.
Steps to Optimize Your Mac:
- Close Unnecessary Apps: Apps like video editors or web browsers with many tabs use a lot of memory and power. Close apps you don’t need.
- Restart Your Mac: Restarting can fix minor problems and free up memory.
- Check Background Apps: Use Activity Monitor (in Applications > Utilities) to see if any apps use too much CPU, memory, or network power.
Optimizing your Mac helps reduce lag and improve video and audio quality, making the mirroring experience smoother.
Close Unnecessary Apps to Reduce Lag
Lag can be a problem when mirroring high-quality content or giving a presentation. Extra apps running in the background can slow down your Mac, especially using wireless methods like AirPlay.
Best Practices to Reduce Lag:
- Use Activity Monitor: Open Activity Monitor to find and close apps using too many resources.
- Quit Unused Programs: Keep only the apps you need for mirroring open. This lets your Mac focus on the task at hand.
- Turn Off Notifications: Use Do Not Disturb to stop notifications from popping up during your session.
By closing unnecessary apps, your Mac can use more resources to ensure smooth mirroring.
Ensure Your Wi-Fi Network is Strong and Stable
To avoid buffering and interruptions, a strong Wi-Fi connection is essential for wireless mirroring. Weak or unstable Wi-Fi can cause lag, blurry images, or disconnect.
Tips for a Stronger Wi-Fi Connection:
- Use 5GHz Wi-Fi: If your router has both 2.4GHz and 5GHz bands, connect to the 5GHz band for faster speeds and less interference.
- Minimize Interference: Place your router in an open spot away from metal objects and thick walls that block the signal.
- Restart the Router: Restarting the router can help improve the signal if you notice lag or dropped connections.
A strong Wi-Fi connection is key for smooth wireless mirroring, especially for high-quality video.
Keep Your macOS and Apps Updated.
Updating macOS and screen mirroring apps improves performance, fixes bugs, and adds new features. Updates also help your system work better with other devices.
How to Update macOS and Apps:
- macOS Updates: Go to System Preferences > Software Update to check for updates. This keeps your system stable and working with new software.
- Update Mirroring Apps: If you use apps like AirBeamTV or JustStream, download the latest version from the App Store or the app’s website.
Updating your system and apps will help your Mac run better, smoothing screen mirroring.
Use a Wired Connection (e.g., HDMI) for Critical Presentations
Wireless mirroring is convenient, but a wired connection like HDMI is more stable, especially for important presentations. Wireless methods can sometimes lag or lose signal, especially in crowded networks. HDMI ensures a steady connection.
When to Use a Wired Connection:
- Business Presentations: For work, HDMI provides a stable connection without interruptions.
- High-Quality Streaming: For HD or 4K content, HDMI avoids Wi-Fi problems that could affect the video.
To use HDMI, ensure you have the correct adapter for your Mac (e.g., Thunderbolt to HDMI or USB-C to HDMI). This provides a smooth and professional experience.
By following these tips, you can improve the quality and reliability of your screen mirroring, whether for work or fun. Optimizing your Mac, network, and tools will enhance your experience.
The Future of Screen Mirroring on Mac
Screen mirroring on Mac will improve with new technologies. Right now, AirPlay, third-party apps, and wired connections make it easy. But soon, updates will make it even faster and more functional.
New Trends in Screen Mirroring for Mac
New trends and tech will make screen mirroring easier and more reliable. These include better wireless tech, updates to macOS, and more device compatibility.
- Better AirPlay FeaturesAirPlay is the primary way to wirelessly mirror screens on Apple devices. Updates could make streaming smoother and improve device sync. We may also see better links with Apple TV for more apparent resolution, faster connections, and less lag.
- macOS Updates for Smoother MirroringApple is constantly improving macOS. New versions will make screen mirroring easier by helping users switch between devices faster. Mac will also work better with other Apple devices, making screen mirroring smoother.
- Support for High-Quality StreamingScreen mirroring must handle these higher resolutions as 4K and 8K content grows. AirPlay and third-party apps will improve to support high-quality streaming without lag, making videos clearer and smoother.
- AI for Smarter Connections Artificial intelligence (AI) could help improve screen mirroring, adjust video quality, and choose the best connection type based on your network. It might also decide whether a wired or wireless connection is best for your content.
The Future of Cross-Platform Screen Mirroring
An exciting change is better cross-platform support. Right now, AirPlay works best with Apple devices. However, future updates could make it easier to mirror from Mac to non-Apple devices like Windows PCs, Android phones, or gaming consoles.
- Better Cross-Platform Support Apple may make mirroring from Mac to non-Apple devices easier. This would let you share content with Android TVs, Windows PCs, or Chromecast devices without extra software or adapters.
- More Devices for Wireless Mirroring As smart home tech grows, more devices will support screen mirroring. This could include bright projectors, smart fridges with screens, and more. With more devices, screen mirroring will be more flexible and valuable.
- AR and VR Integration With the rise of augmented reality (AR) and virtual reality (VR), screen mirroring could include these technologies. For example, you could mirror your Mac’s screen into a VR headset or use AR overlays during presentations. This would create new chances for creative work, gaming, and interactive experiences.
The Path Forward: Improving User Experience
Future updates aim to make screen mirroring easier, faster, and more compatible. They also aim to reduce setup time and improve performance for work, entertainment, and personal use.
Security and privacy will also be necessary. As more devices support screen mirroring, keeping your content safe will be key. Future updates will likely include stronger encryption and better privacy features to help.
In conclusion, the future of screen mirroring on Mac looks excellent. With better integration, faster speeds, and more secure connections, Mac users will enjoy a smoother and more flexible experience.
Conclusion
Screen mirroring is a valuable tool for Mac users. It makes sharing content easier for work, fun, or personal use. For example, you can show slides or watch movies with friends by mirroring your Mac’s screen to a larger display.
This article covered different ways to mirror your Mac’s screen. AirPlay is the easiest choice, especially for Apple users. It connects wirelessly to Apple TVs and other AirPlay-enabled devices. Third-party apps, like JustStream and AirBeamTV, give you more options, especially if you need to communicate with non-Apple devices. HDMI offers a stable, high-quality display if you prefer a wired connection. It’s perfect for presentations or when Wi-Fi isn’t reliable.
Screen mirroring can improve your work and entertainment. It’s an excellent tool for sharing content, presenting, or showing a photo.
Try screen mirroring on your Mac to find the best method for you. The right tools can make your tasks more manageable at home and work.
Have you tried screen mirroring on your Mac? Leave a comment below with your thoughts and tips!
For more help, check out these articles:
- Best Laptop & Computer Repair Near YMCA Levittown
- DVE Tech Services – Seamless IT Solutions for Your Business
- Desktop Publishing Services in Levittown – Get Professional Prints
As technology advances, businesses and individuals will continue to find innovative solutions to improve experiences. Whether you’re looking for reliable repair services, IT solutions, or professional publishing options, resources are available to enhance your productivity and efficiency.
I hope that this comprehensive article has taught you everything about screen mirroring on MacBook and answered all your questions. Hopefully, you have also been able to resolve your issues. However, if you still face problems and live in Levittown, you can visit the DVE Tech Services office directly to resolve your issues.